Tungsten Inert Gas (TIG) welding is valued for its precision and control, particularly when welding non-ferrous metals like copper and brass. However, these materials pose unique challenges due to their high thermal conductivity and sensitivity to contamination.
This guide outlines how to TIG weld copper and brass effectively, covering common obstacles, preparation steps, welding setup, filler metal choices, and essential techniques.
Understanding the Challenges of TIG Welding Copper and Brass
Copper and brass are both excellent conductors of heat and electricity, which is an advantage in many applications but a challenge in TIG welding.
1. High Thermal Conductivity
Copper and brass dissipate heat rapidly, which means you’ll need higher amperage to maintain a stable arc and achieve full penetration. Without sufficient heat input, the weld may not fuse properly.
2. Oxidation and Contamination
Both metals oxidize quickly, especially copper. Contaminants like oil, dirt, or oxides can weaken weld quality and cause porosity or cracking. Brass also contains zinc, which can vaporize during welding, producing toxic fumes and making the process more difficult.
3. Warping and Cracking
Due to the high heat required, parts can warp easily. Brass in particular is prone to cracking if overheated, especially when zinc begins to evaporate.
4. Fume Hazard (for Brass)
Zinc in brass poses a health hazard during welding. Inhalation of zinc fumes can cause metal fume fever, a serious short-term illness. Adequate ventilation or fume extraction is essential.
Preparing Copper and Brass for TIG Welding
Preparation is key to successful TIG welding of copper and brass. Clean surfaces result in stronger, more reliable welds.
1. Mechanical Cleaning
Use a stainless steel wire brush, sanding disc, or emery cloth to remove surface oxides, especially from copper. Do not use carbon steel tools, as they may introduce contaminants to the base metal.
2. Degreasing
Clean the surfaces thoroughly with acetone or alcohol to eliminate oils, grease, and other contaminants. This step is crucial for reducing porosity and achieving a strong arc.
3. Beveling Edges (if required)
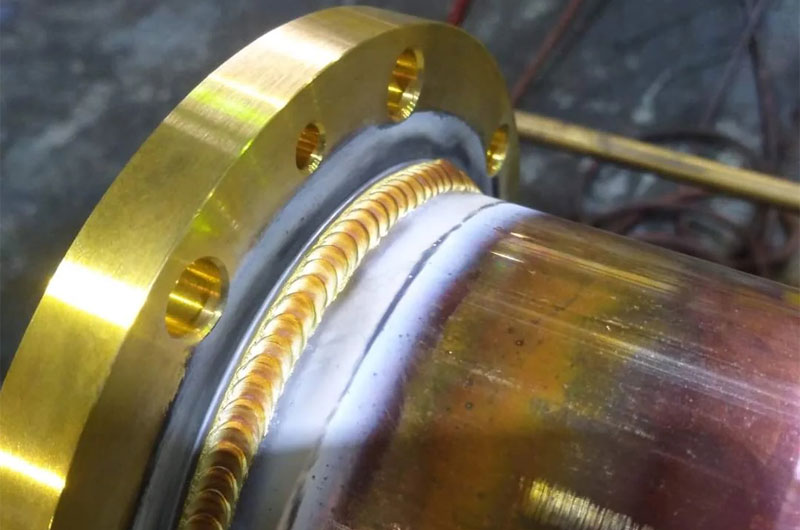
For thicker sections, bevel the edges to ensure good penetration and full fusion at the joint. A V-groove is commonly used.
4. Preheating (especially for Copper)
Preheating is often necessary to counteract copper’s high thermal conductivity. Use a torch or oven to preheat the base metal to 300–600°F (150–315°C), depending on thickness.
5. Fixturing
Clamp parts securely to prevent movement, warping, or shrinkage. Use copper backup bars to support the weld if needed.
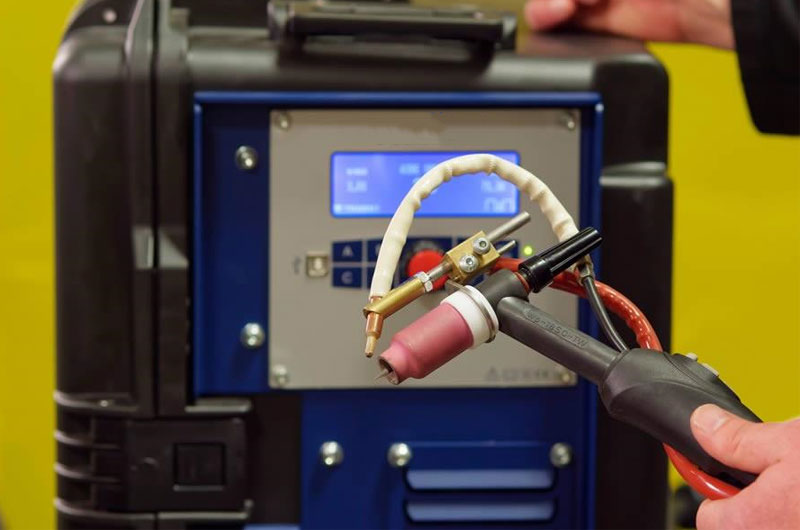
TIG Welding Setup
Proper machine setup ensures the arc is stable and penetration is sufficient.
1. Polarity
Use Direct Current Electrode Negative (DCEN). This setting concentrates the heat at the workpiece, which is necessary for metals with high thermal conductivity.
2. Amperage Settings
Use high amperage—typically 130–200 amps or more, depending on material thickness. Copper may require higher amperage than brass.
3. Tungsten Electrode
- Type: 2% Thoriated (Red) or 2% Ceriated (Grey)
- Diameter: 3/32″ (2.4 mm) or larger for thicker materials
- Tip: Sharpened to a point for better arc control
4. Shielding Gas
- 100% Argon is standard for TIG welding copper and brass.
- Gas flow rate: 15–25 CFH (cubic feet per hour).
- Ensure a steady gas flow to protect the weld pool from oxidation.
5. Torch Setup
Use a water-cooled torch if welding at high amperage for extended periods. Air-cooled torches may overheat when welding thick copper.
Filler Metal Selection
Choosing the right filler metal ensures proper metallurgical compatibility and weld strength.
For Copper:
- ERCu (Deoxidized Copper):
Best suited for welding pure copper. It contains deoxidizers that improve puddle fluidity and reduce porosity. - ERCuSi-A (Silicon Bronze):
Common when joining copper to other metals or where higher strength and corrosion resistance are needed.
For Brass:
- Silicon Bronze (ERCuSi-A):
The most commonly used filler for brass. It minimizes zinc burn-off and provides a stable arc. - Avoid Using Brass Fillers:
Brass filler rods contain zinc, which vaporizes during welding, increasing fume production and the risk of porosity.
Dissimilar Metal Welding
When joining copper or brass to steel or stainless steel, silicon bronze filler is usually the most suitable.
Welding Technique
Mastering the technique is the final step to creating strong, clean welds.
1. Preheat When Needed
Always preheat thick copper pieces to avoid cold starts and ensure proper fusion.
2. Maintain a Short Arc Length
Keep the tungsten close (1/8” or less) to maintain arc stability. A long arc may cause arc wander and contamination.
3. Control Travel Speed
Weld slowly enough to allow proper fusion but fast enough to prevent excessive heat buildup. Adjust your pace based on how fluid the weld pool is.
4. Use a Weaving Motion (Optional)
For wider joints or when filling a groove, a gentle side-to-side weave can help control bead shape and penetration.
5. Add Filler Consistently
Insert the filler metal at the front edge of the weld puddle for optimal fusion. Avoid touching the tungsten with the filler to prevent contamination.
6. Post-Weld Cooling
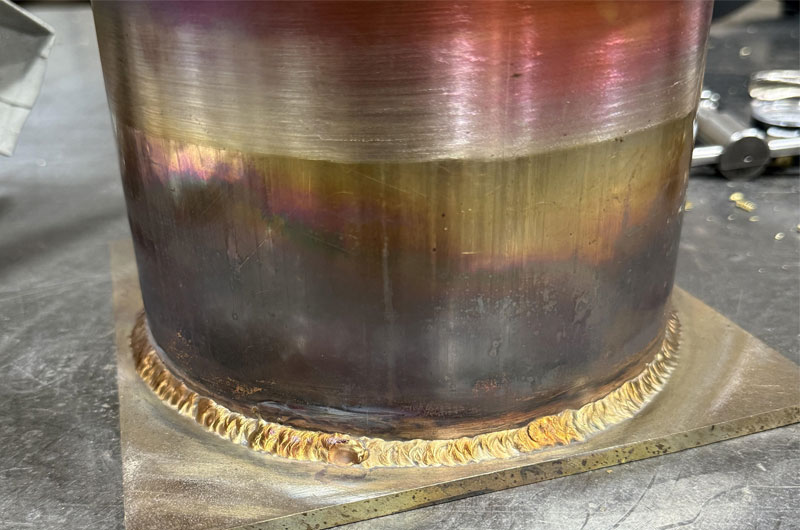
Allow the part to cool slowly. For brass, this helps avoid cracking due to thermal stress. Do not quench with water.
7. Inspect the Weld
Look for porosity, discoloration (indicating oxidation), and incomplete fusion. A proper TIG weld on copper or brass should be smooth, uniform, and slightly convex.